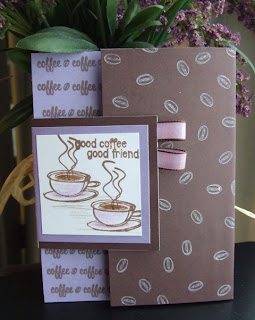
 This card is inspired by a card I saw at the Hallmark store. I thought about it for a couple of days and thought I had it figured out. I hadn't tried it yet, though. I dreamed I was making the card and ran into trouble with my original idea and came up with the solution. I woke up and took notes. All that was left was for the coffee stamps to arrive so that I could try it.
*You might notice that the purple on the card seems to change. It does. I photographed this process twice with two different purples and chose the best pictures from each set.
Supplies:
Stamps:Clear Design Coffee set(Hero Arts)
Ink: Chocolate & Blueberries ink queue (Colorbox)
Paper: Wisteria or Violet and Chocolate note cards( Hero Arts)
Other: color pencils (Prismacolor), ribbon, bone folder, magnetic snaps (Basic Grey)
Pre-Cut pieces:
(A) Two A2 note cards (8 1/2 x 5 1/2" folded to make a 5 1/2 x 4 1/4" card)
(B) One purple 2 1/2 x 5" piece folded to make a 2 1/2 square card (white inside)
(C) Two brown squares ( 2 3/4 x 2 7/8")
(D) One 2 1/8" white or cream square


1. Start with two cards( A). 2. Turn the purple card inside out and use the bone folder to smooth the fold the other way.
Fit the two cards together as shown, but before you glue it..
Insert (B) what will become your flap. With the purple side of the big card up, insert so that the little also has the purple side up. Use double stick adhesive to secure the bottom half only with the flap in between.
Fold down the next layer and add adhesive.
Fold brown side down and burnish with the bone folder. Trim uneven edges. The card should open on the left side. Trim 1 ½ inch from the front or top side, exposing the purple interior.
This is what you should have so far.
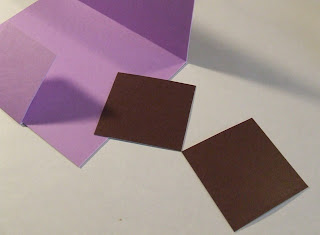
Now, bring in the 2 brown squares.

Add adhesive to the back of the flap and attach one of the (C) brown squares.

Your flap now has a brown border.
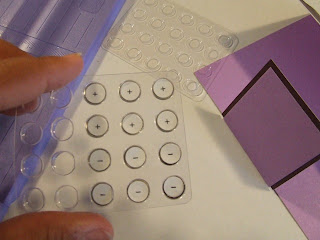
The Basic Grey magnetic snaps have a positive and negative. Take one of each from the package. They come with adhesive already one them, but I add glue dots to make sure it's secure.
Remove paper backing, add glue dot and center it along the edge of the flap.

Attract the other magnet to it. Remove the paper backing and add a glue dot and close the flap down on the brown card front.

When you open it back up the magnets are in place.

Add ribbon and adhesive. Cover with the other brown square hiding the snap and the ends of the ribbon.

Stamp ‘coffee cups’ and ‘good coffee good friend’ on white card stock and add it to the flap.

Stamp 'coffee coffee' inside in brown on the areas that will be exposed when the card is open.

Stamp coffee bean on the brown card front.

* Optional: Create a pocket to hold a gift card inside on the right.

Color and you're done!
It was pointed out to me that the magnet could affect the strip on the gift card. You can substitute a Velcro Dot just to be safe.


.JPG)
.JPG)


1 comment:
This is amazing and in-depth tutorial for a really nice card... and um... the marriage of purple and brown and the clever combination of various artsy stuff makes me think of um... brown and purplenessosity. I'm sorry, I'm really not crafty enough to post a knowledgeable response, but, um... it's really pretty. good job. :)
Post a Comment